How I Learned to Cut Dovetails By Hand
A photo-heavy review of Tools for Working Wood's "Mastering Dovetailing" class
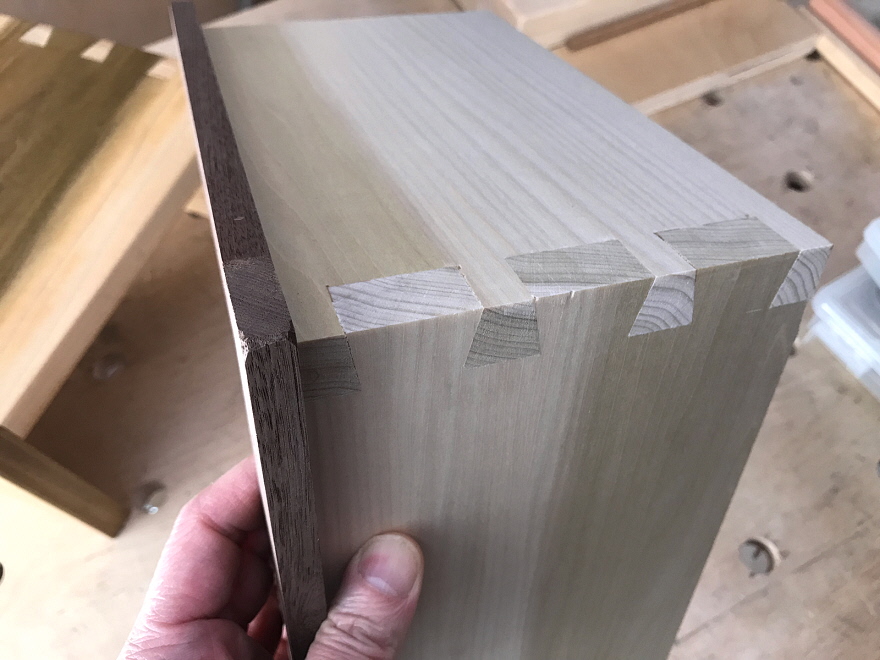
I've wanted to be able to hand-cut dovetails for years, and I'm proud to say I now can! I recently took "Hand Tools Skills - Mastering Dovetailing," a four-session class at Tools for Working Wood in Brooklyn. This is a review of that class.
 Enter a caption (optional)
[Full disclosure: Tools for Working Wood waved the tuition fee in exchange for an honest review of the class.]
The Methodology
What sets this class apart from other dovetailing classes is the instructor, TFWW founder Joel Moskowitz. Joel is a woodworker and a history buff who has done a lot of research into how 18th-Century British workshops ran. Thus, in Joel's class, you're not just learning to cut dovetails, but you're learning to do it in a very old-school and efficient way. "We try to mimic late 18th-Century methods used by apprentices who churned out dovetail after dovetail with simple tools, basic techniques, and practice," Joel says.
Cutting dovetails requires getting a lot of different things right. Joel has broken those things down into a series of essential skills, then has you move through them step-by-step, with each class building on the skill you learned before.
The class I took was broken into four sessions (which has now been reduced to three, see the bottom of this entry):
Session 1 - Sharpening*
"Something that really slows people down," Joel explains, "is not having sharp tools. I mean really sharp tools." Thus the first class had one simple goal: To teach you how to quickly turn a dull or damaged tool into a razor-sharp blade that slices through the wood. This crucial skill, Joel explained, would be one of the first things an apprentice in a traditional shop would need to master, and they wouldn't have all day to fuss over it.
People's sharpening methods vary widely and are kind of like family recipes. Joel's method is based on speed and efficiency.
We first covered the basics of blade geometry.
 Enter a caption (optional)
Next we went on to grinding: Why to grind, when to grind and perhaps most importantly, how to grind without overheating the blade and ruining it. As someone who does not have much experience with freehand grinding (in my own shop I use a Tormek wet grinder with jigs), I was a bit surprised at how little time it took Joel to grind a blade by eyeballing it, tapping the toolrest this way and that. He showed us a very specific sequence of grinding, examining, adjusting and quenching. I won't go into specific detail because that's basically the secret sauce, but I will say I found it edifying.
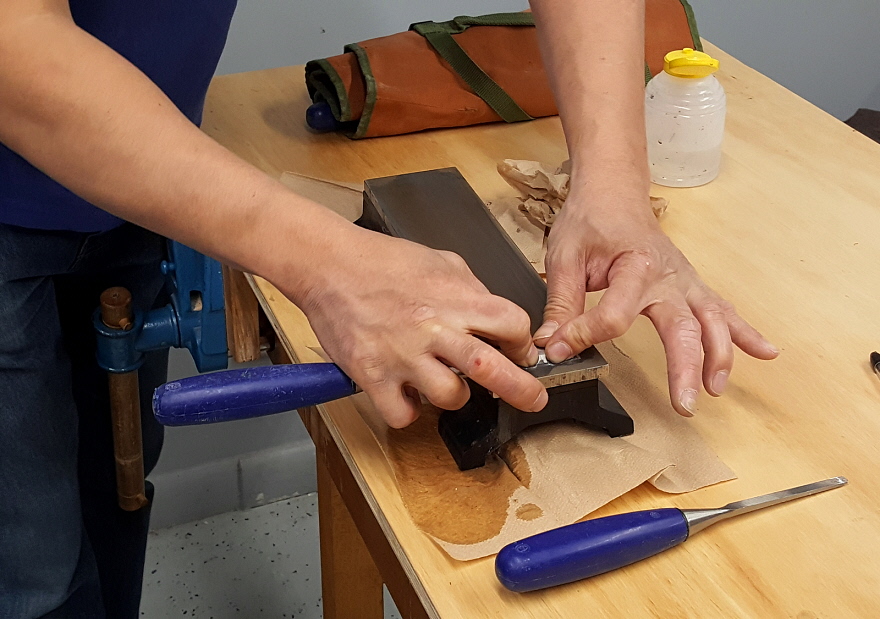
After grinding we moved to the stones. Joel's "recipe" calls for a dual-sided diamond plate and an 8000-grit waterstone.
 Enter a caption (optional)
 Enter a caption (optional)
Next we moved onto stropping.
 Enter a caption (optional)
Again the emphasis is on speed, as in an old-school workshop (or heck, a modern-day one) that's cranking out furniture, tools would constantly be going dull and would frequently require re-sharpening. By getting this down to a science, you can get back to work as quickly as possible.
At the end of the three-hour class, I had razor-sharp chisels. That in itself isn't so important; what's more important is that I now had the knowledge of how to quickly restore those edges after I slam them into a knot or some tough endgrain. In a working shop, sharpening shouldn't be some singular event, like taking a bath in the evening, but more like washing your hands throughout the day.
As for sharpening supplies for your own shop: At least one of the students mentioned that the diamond plates were out of their budget, and Joel then explained how to do a lower-cost process using sandpaper and a piece of flat glass. So you don't have to buy diamond plates to use his sharpening method. (You will, however, probably need access to a grinder at some point, unless you have a lot of patience.)
Session 2 - Learning to Saw Straight, Cutting Tails, Chopping Waste
To cut dovetails, you must be able to saw straight. And in two axes: You must be able to cut both perpendicular to the face of the board and perfectly plumb.
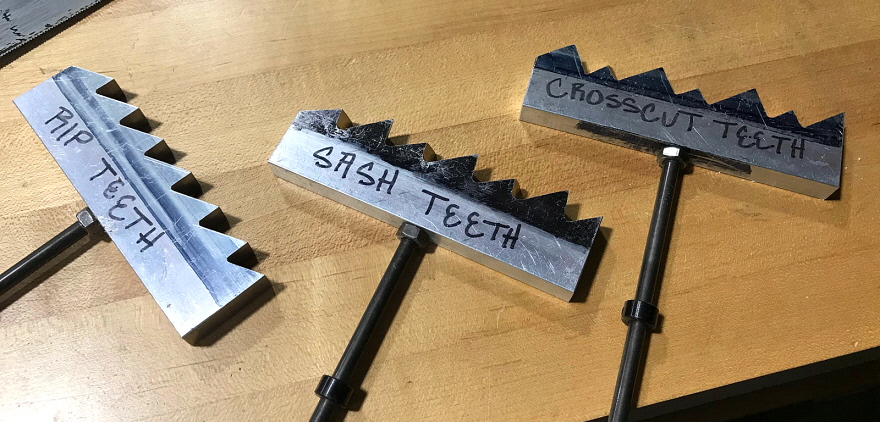
Joel kicked this session off by explaining saw tooth geometry, then demonstrated how to use a saw correctly.
 Enter a caption (optional)
 Enter a caption (optional)
 Enter a caption (optional)
 Enter a caption (optional)
 Enter a caption (optional)
 Enter a caption (optional)
He then had us practice this exhaustively by chucking up a bunch of 1/2-inch poplar boards in a Moxon vise and going at it. To my surprise he taught us how to do this without making any marks at all. "I want you to get good at eyeballing," he explained. By following his tips, I learned that you can actually "see square" pretty easily.
 Enter a caption (optional)
But sawing square is something I've always had trouble with, and it was very gratifying to see sharp improvement in just one three-hour session. You can read about how to saw straight and watch videos about it, but what I found most helpful was having someone actually standing there and watching what you're doing, then offering tips.
These tips differ from person to person, because our bodies and body mechanics are all different. For example, after analyzing one student's sawing technique Joel suggested that she stand slightly differently, and this seemed to improve her accuracy.
 Enter a caption (optional)
 Enter a caption (optional)
The advice was different for me. Joel showed me at least two things that really helped. The first was a trick for how to straighten a cut gone astray at the beginning, before you fully commit. The second was a piece of advice that seems obvious, but that totally clicked for me: "You have to analyze what you're doing," Joel explained. Pay attention to what your body is doing as you make the cut. Then analyze the cut. Is it slanted? Why? Is your elbow tracking straight? Are you putting too much downward pressure on the saw? Then adjust, make another cut, analyze again, adjust again. By making a series of microadjustments to my technique, by the end of the class I was producing better-quality cuts than I was at the beginning. More importantly, I learned that you do this by identifying what the variables are that are influencing your cut, then start making corrections one-by-one.
 Enter a caption (optional)
 Enter a caption (optional)
For the second half of the session we also began cutting tails, that is, cuts that are still perpendicular to the face of the board, but slanted along the grain.
 Enter a caption (optional)
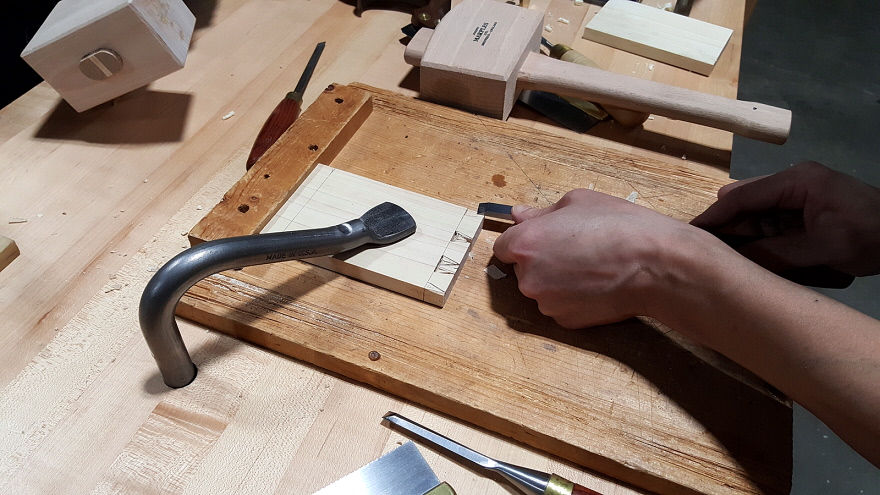
Again we laid this out by eye, not making any marks nor using a dovetail gauge. We also learned the traditional way of removing the dovetail waste, which was to first kerf it up with the saw, then chop it out with chisels.
 Enter a caption (optional)
Perhaps most importantly, he showed us the trick of how to correct for the chisel's tendency to move backwards into the cut. By the end of it we had tails with nice, clean, crisp baselines.
 Enter a caption (optional)
Joel then gave us boards to take home to practice on. I really wanted to improve so I did this every day. I didn't have a Moxon vise in my home shop, but you can get around this with some Irwin clamps and some boards.
 Enter a caption (optional)
 Enter a caption (optional)
Session 3 - Marking and Mating the Pins
When Joel had been cutting the tails, he did it quickly and with an unconcerned air. But now that the tails were cleaned out and it was time to transfer them to the pinboards, I saw he was paying very close attention to what he was doing.
 Enter a caption (optional)
This is when I realized that however you cut the tails doesn't really matter, as long as they're square; the real "magic" is in how you transfer their outline to the pinboard and accurately cut to that line.
 Enter a caption (optional)
Joel showed us his preferred marking method and a way to make those lines more visible, then we started sawing and chopping.
 Enter a caption (optional)
I was conservative in my cuts, erring too far on the side of the waste line, and my pins took a bit of paring and malleting to fit. Joel explained that the ultimate goal is to get the joints to fit "straight from the saw," as that's of course what would have been done in a traditional shop.
He then gave us a pile of small boards to take home for practice. The idea was to do one pair of boards each day. Not more, not less, he explained; exactly one. The idea is to build up muscle memory over time, not trying to cram it and not letting it atrophy.
In my home shop, I practiced pretty diligently, and made some progress (even if I still had to pare a bit).
 Enter a caption (optional)
 Enter a caption (optional)
 Enter a caption (optional)
Session 4 - Half-Blind Dovetails
Traditional drawers are made using half-blind dovetails, so that the drawer face has a clean appearance. A joiner/cabinetmaker in 18th-Century Britain would be required to produce these more complicated joints as a matter of course, so that's the final thing we learned.
I found this pretty challenging, as you cannot saw all the way through the pinboard, but must instead learn to do it at a compound angle:
 Enter a caption (optional)
 Enter a caption (optional)
In contrast to through-dovetails, with half-blinds there is no way to get the joint ready straight from the saw; all of the waste must be chopped and pared away. Joel showed us a couple of tricks to hasten the process. This is also where that wall of tools in the store came in handy: It's not a mere display, but is loaded up with sharp tools ready to be used. I grabbed a skew chisel, the first time I'd ever used one, and it was indispensable for getting into those back corners.
 Enter a caption (optional)
I was the slowest in the class, but managed to complete it in time. We all did, here they are:
 Enter a caption (optional)
 Enter a caption (optional)
Conclusion/Takeaways
If you want to learn to cut dovetails by hand, I highly recommend this class.
The atmosphere is casual but Joel covers a lot of material in this class, so you need to pay attention.
The home practice element was crucial. You can't just show up to class and be anointed with the ability. I was pretty diligent about putting in the practice between classes and, satisfyingly, it paid off.
I liked the no-nonsense approach and Joel's focus on old-school efficiency and practicality.
I also liked that you have access to TFWW's tools. By chopping with one of my own chisels that I'd sharpened myself, then with a store chisel that Joel had sharpened, I saw a marked difference in ease-of-use and learned that I wasn't taking my own sharpening far enough.
 Enter a caption (optional)
I dug learning this skill in a class rather than through books or YouTube videos because I feel that, hour for hour, a class is more efficient. Having an instructor there who can correct you on-the-fly, and give personalized advice, made me feel I was picking it up much quicker than I would if I were trying to just learn it on my own.
Who Should Take This Class?
I found the demographics of the class interesting: In addition to hobbyist woodworker/design blogger me, there was a professional (power-tool-using) furniture builder, an architect and a carpenter.
Should You Take a Class or Buy a Magnetic Guide?
Two months ago I watched a YouTube video of a guy who was frustrated because no matter what he tried, he couldn't get the hang of dovetails. So he bought a magnetic guide and a Japanese pull saw, and then he could do it.
They key there is the "no matter what he tried;" in other words, he didn't know what he was doing wrong, so he didn't know what to work on correcting. Because Joel laid out for us exactly what could go wrong, I understood what all of the required elements were, knew what to practice, and millimeter by millimeter my dovetails got better.
And now I can cut dovetails by hand with a minimum of fuss.
While I could have just purchased a guide and called it done, for me the satisfaction is in gaining a skill that I can continue to use forever.
Plus they're fun to make. After the class had ended, I made this dovetail-board-jig thingy to make the marking step easier:
 Enter a caption (optional)
 Enter a caption (optional)
I then grabbed some pieces of scrap, and used them to make this riser for my external monitor:
 Enter a caption (optional)
I'm pleased to report that these are the tightest tails I've done yet, and I got them to fit straight off the saw!
 Enter a caption (optional)
 Enter a caption (optional)
________________________
*In an effort to reduce the cost to students, Tools for Working Wood has now broken the sharpening session out into a separate class, and reduced the price of the dovetailing class. They'll be offering the dovetailing course again in January, limited to six students per class. You can learn more here.
-
o1Favorite This
-
Q6Comment
K
{Welcome
Create a Core77 Account
Already have an account? Sign In
By creating a Core77 account you confirm that you accept the Terms of Use
K
Reset Password
Please enter your email and we will send an email to reset your password.


Comments
Hey Rain, thank you very much for sharing your experience. I've just started a job as a furniture maker but I'm really an apprentice cos I'm still studying Cabinet Making...anyways, one of my first tasks was, guess what?? Dovetail! I'm still struggling to get it right and I was on my way to buy a dovetail cutting guide but after reading it, I've decided to build up my skills (freehand) and master it, it doesn't matter how long it will take. Cheers!!!!
I read this article a little while back as I plan to shift more towards handtools. I would've have no doubt that JM would be tremendously knowledgeable; it's definitely worth noting that it seems this course effectively used evidence based learning techniques (whether intentional or not). Spaced repetition, immediacy of feedback, scaffolding component-skills, teaching self-evaluation. These are of kind of things featured in K. Anders Ericson's research on deliberate practice.
Why not just use box joints? Way easier and almost as strong. Less time = more time for other things.
Because dovetails are awesome! Aesthetic and functional!
Rob: This is like you telling me that you like to go jogging, and I ask why you don't just drive.
Very interesting. Thanks for this hands-on report from the field.